|
I spent much of today working on the new model, and Dr. Bohl, Sarah, and I began to explore incorporating electricity into the model to add some interesting functionality. I can't go into detail about the specific additions, since they are novel enough that they will likely be patented. However, these models will likely be on sale in the near future, so if you're curious, they will eventually appear in the new models section of this website: https://www.spinestud.com/. Dr. Bohl also showed me how to do a simple surgery with one of the Spine STUD models today! This was the first model surgery I've tried, and I found it fascinating. The photo below shows the end result of the surgery. 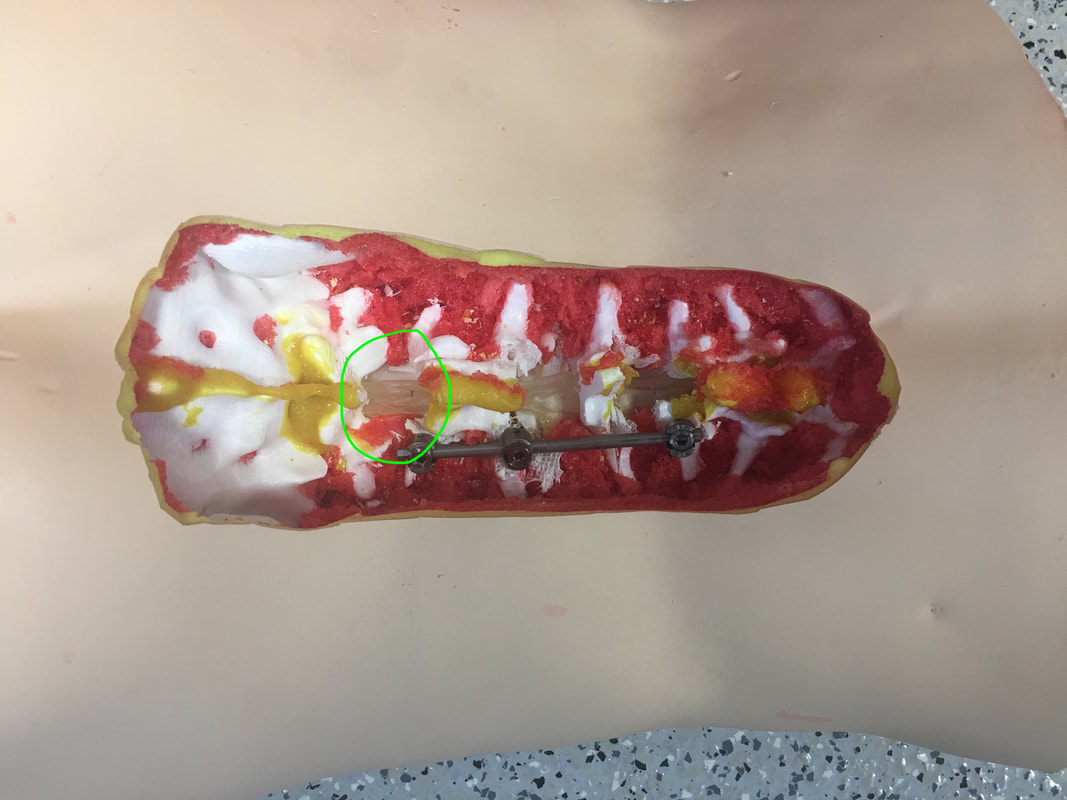 This surgery involves using large screws to secure a titanium bar to the spine to keep the spine straight. This general technique is used to treat a wide range of spinal deformities, including scoliosis. The first step in the surgery involved using the tool below to tear away the outer bone layer in a very specific location on a vertebra.  The outer layer of bone is much harder than the inner layers, so I had to expose the inner layers before making a hole for the screw. The mechanical advantage that the tool above gives allowed me to bite into a hunk of the hard outer bone layer and rip it off. It feels almost barbaric, but since a screw will be inserted into the location where the tool is used, it doesn't actually cause any extra long-term damage. One way in which the models are highly realistic is that the outer layer of the plastic is much denser than the inner layers, similar to real bone. 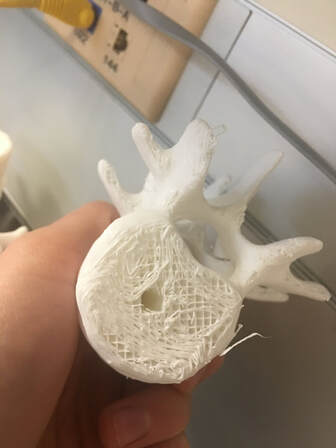 Once the softer inner bone is exposed, it's time to gently drill a hole into which the screw will be inserted. This is done with the tool below. 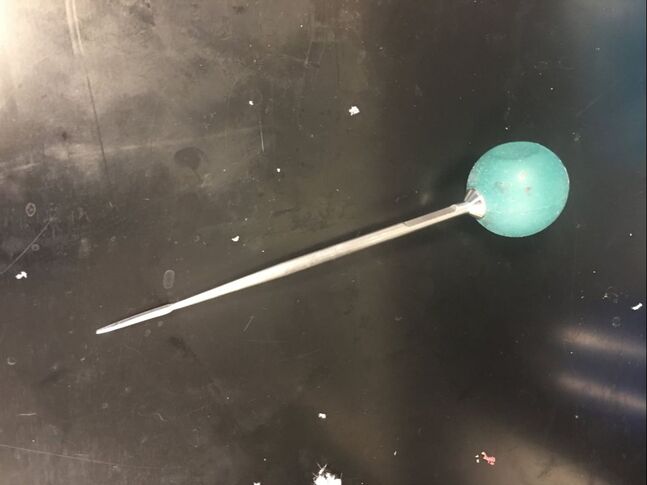 I held the ball on top and slowly turned it back and forth while pressing into the soft bone to make a 40mm deep hole. This is a very precise process, because the tool must be aimed in a very specific direction to avoid unnecessarily damaging hard outer bone layers. I also had to avoid puncturing the fecal sac, which is a long sac that runs down the spine filled with fluid. The models simulate the fecal sac with a flexible tube that can be filled with water that runs down the length of the spine, as can be seen in the photo. I used detailed anatomical landmarks to aim the tool correctly, and the model is realistic enough that all these landmarks are present on the bone. After the hole is deep enough (the tool above has a convenient ruler on it), I had to feel around the inside of the hole with the tool below to make sure that I hadn't exited the soft bone layer. 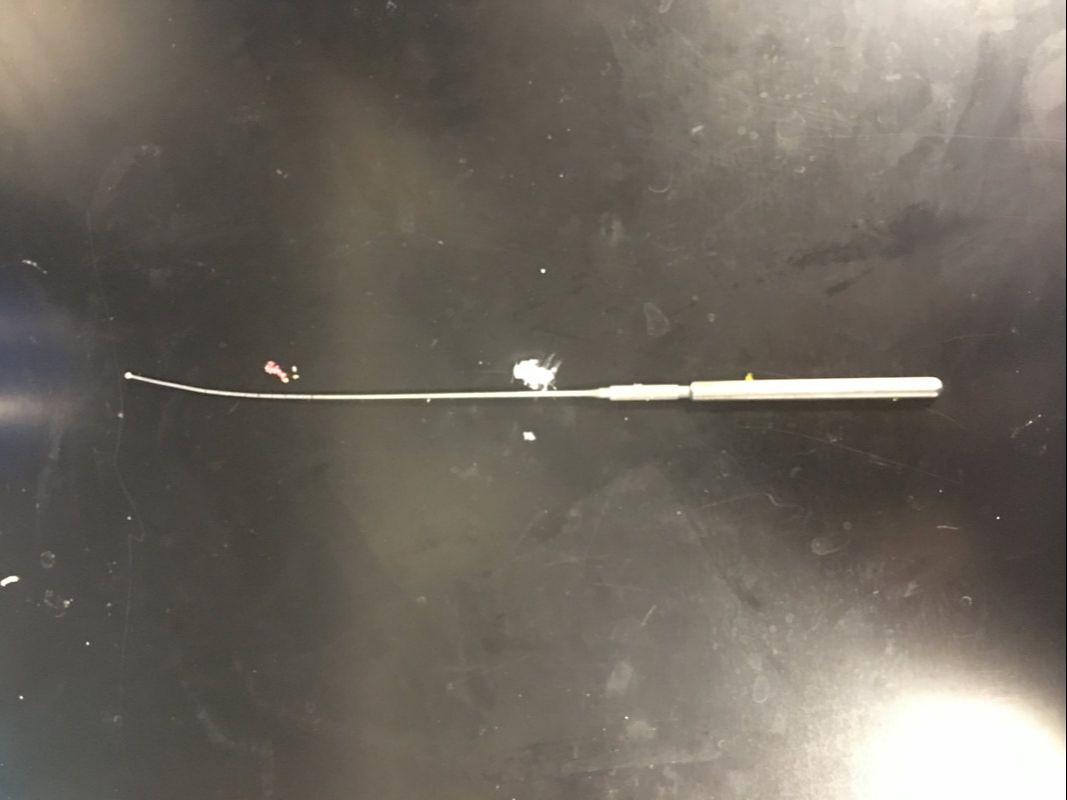 This tool has a ball on the tip, which reduces the risk of damage to internal organs if I made the hole incorrectly. If I feel anything soft, it means I've drilled through the bone, which means that I could be at risk of piercing arteries or other organs. Fortunately, I didn't feel any soft tissue, so I proceeded to use the tool below to insert the screw. 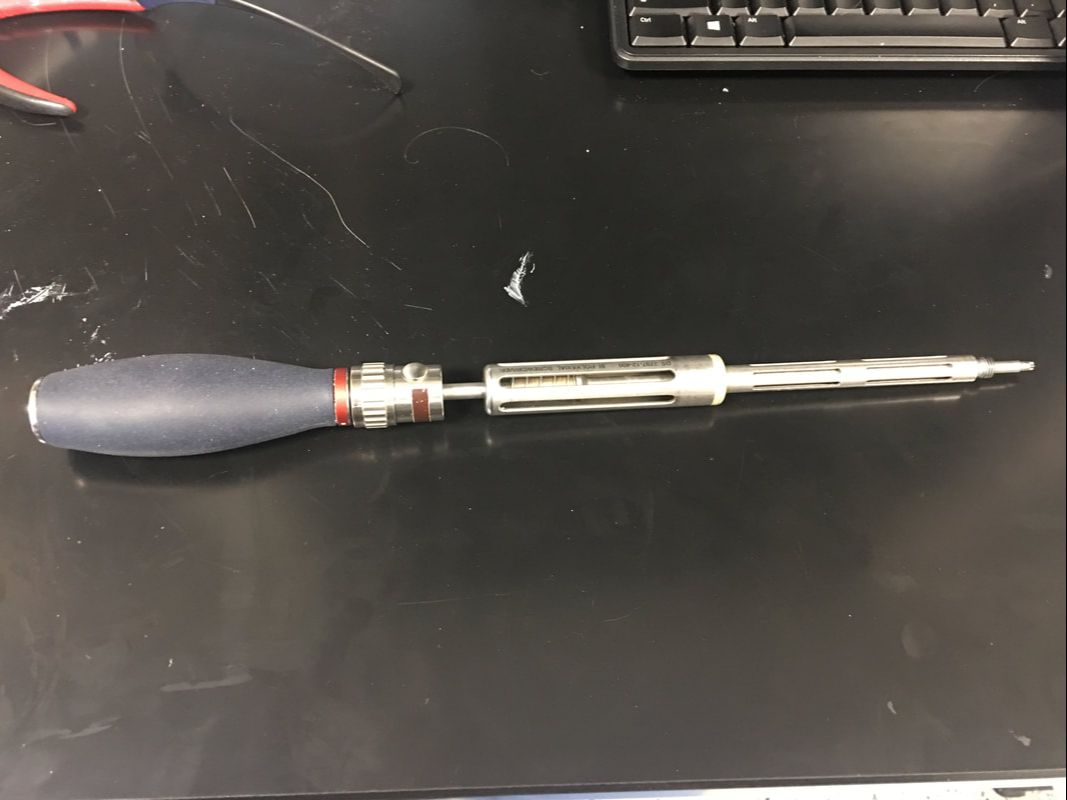 I had to be very careful when putting in the screw as well, because it's even more important not to enter the soft tissue when putting a screw in. I had to keep the tool aimed very precisely as I screwed, and I used the cylindrical grip in the middle of the tool to make fine adjustments to the screw's depth. Eventually Dr. Bohl said that I was far enough down to use the top handle, so I pressed down hard and turned the screw with force. It's amazing how much force is required in a medical procedure as precise as spine surgery! Below is an image of the type of screw that I used. Amazingly, the mean price of such a screw alone is over $800!  I repeated the process above on another vertebra to put in another screw. Once the other screw was in, the model was ready for a rod to be placed in the screws. Titanium rods are used to correct spine disorders by providing additional structure to the spine, and they stay in for the patient's entire life. Unfortunately, the rigid rods restrict mobility somewhat, but a patient's mobility with rods in is almost always superior to their mobility with a severe spinal deformity such as scoliosis. Each person's spine is shaped slightly differently, so I had to bend the titanium rod to the correct shape using the tool below, which is known as a French bender. 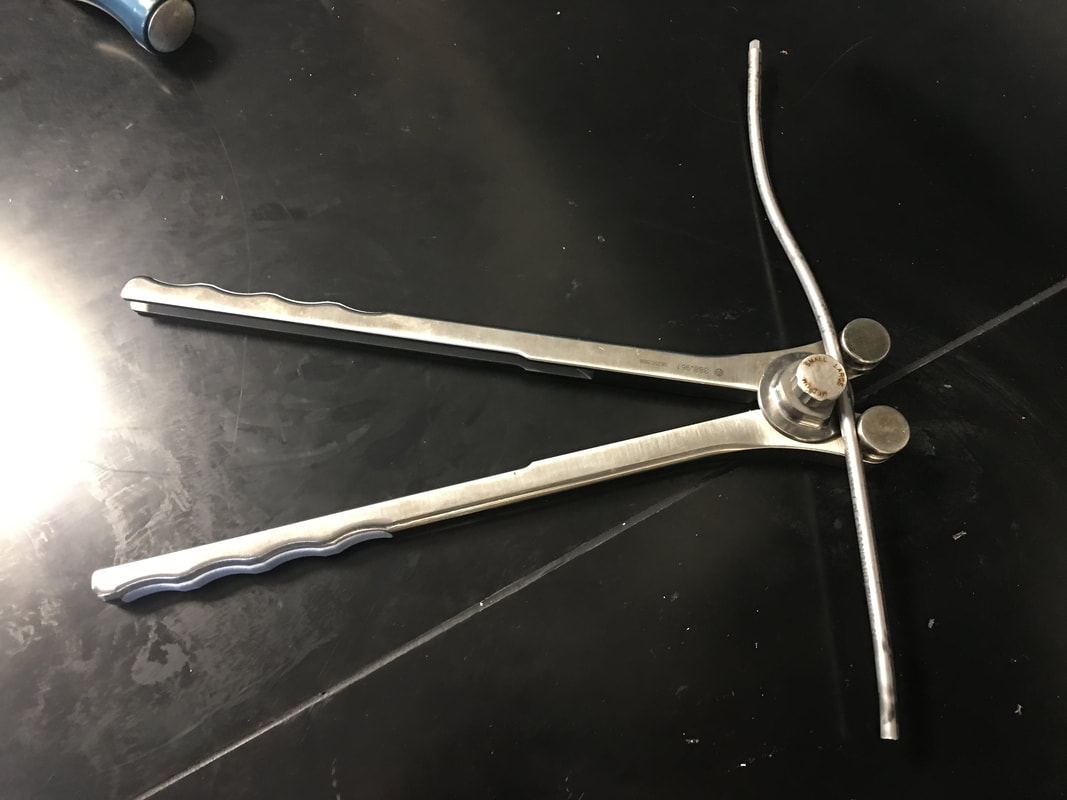 After bending the rod and placing it on top of the screws, which have special slots into which a rod can be placed, I had to secure the rod in the proper position. To do this, I used the tool below. 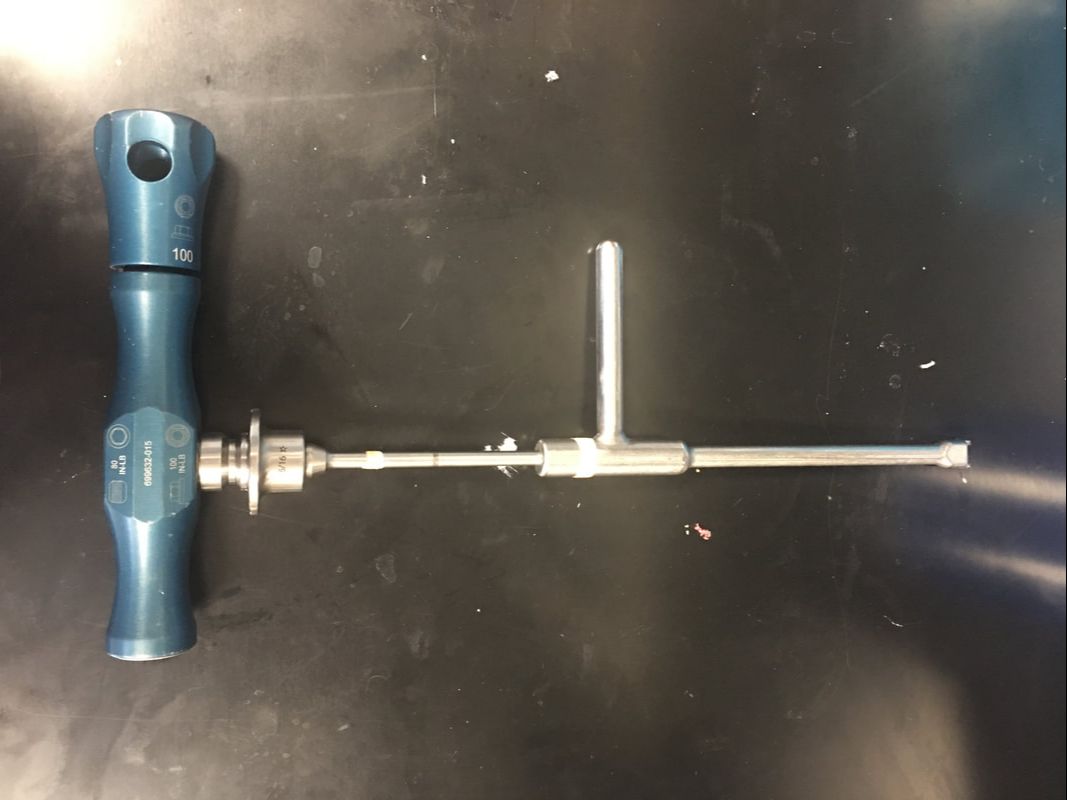 This tool has two handles, each of which I turned in the opposite direction. However, each handle is connected to a different rod, so the torque applied on the top handle tightens the top of the screw around the bar, and the bottom handle keeps the screw in place to prevent it from ripping out of the bone. The device is designed to automatically release when it would require 80 lbs of torque to continue tightening the rod onto the screw, so after I reached the 80 lb threshold, the surgery was complete. Of course, in a real surgery, several more steps would be necessary, including closing the incision, but this was the main part of the surgery. Overall, I found the wide variety of tools used in this surgery alone fascinating. Unsurprisingly, there are many other tools that Dr. Bohl knows how to use. In fact, he says that he has used every tool in the image below many, many times. 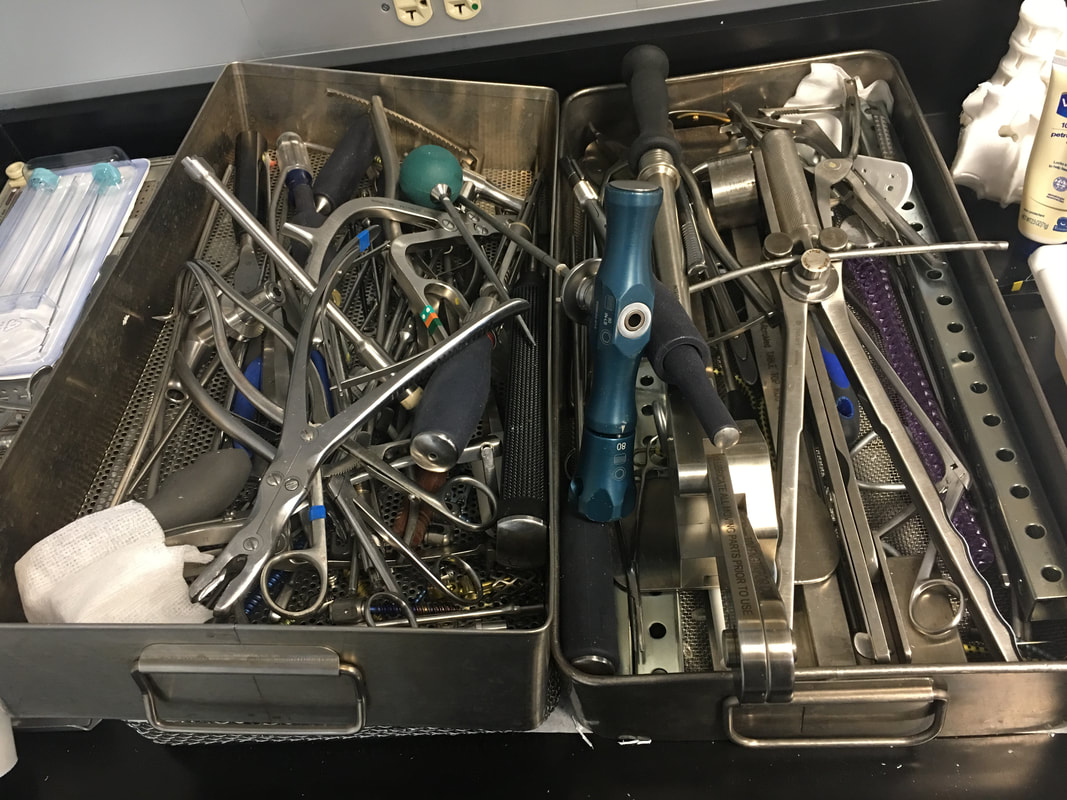 One thing I noticed as I was doing this surgery on the model is that there is a tremendous amount of physics involved in surgery. Through tools from the French bender to the mechanical torque detector, mechanical engineering allows the surgeon to perform maneuvers they never could with their hands alone.
0 Comments
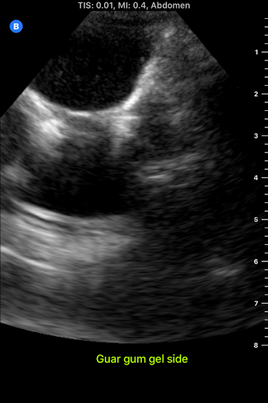
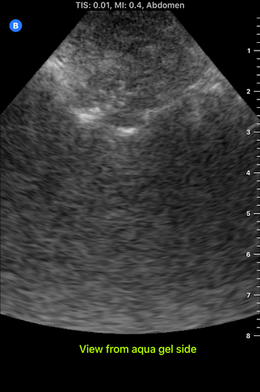
I spent almost the entire day working in the lab today, and I developed my first prototype of the ultrasound phantom I'm working on! There's still lots of stuff that can be improved upon, but this prototype provides a starting point from which to iterate. There are 3D printed spines all over the lab that look like the photo below, and a spine like this one is at the bottom of my model. 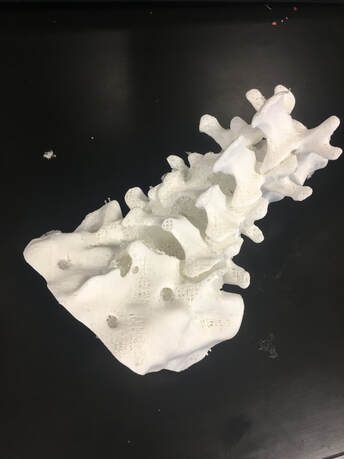 To get the spine to stay still in the position it would be in if a patient were laying on the operating table, I taped the spine down in a bucket, partially filled the bucket with gelatin dyed red, and waited for the gelatin to set. Then, I placed pieces of polyurethane that look like skin on the sides of the spine to separate the gelatin layer from the rest of the model. I made two muscles on each side of the spine-the multifidus and the longissimus-out of polyurethane bags of aqueous material. Ultrasound gel and guar gum gel offered similar levels of visibility in my previous trials, so to further test the effectiveness of each, I made one side of muscles out of blue ultrasound gel, and the other side out of greyish-yellow guar gum gel. I filled every gap between materials with glycerin, because it's important to have all materials physically connected so that the ultrasound waves can travel through them. The spinous process (a part of the spine) is visible poking out from between the muscles. 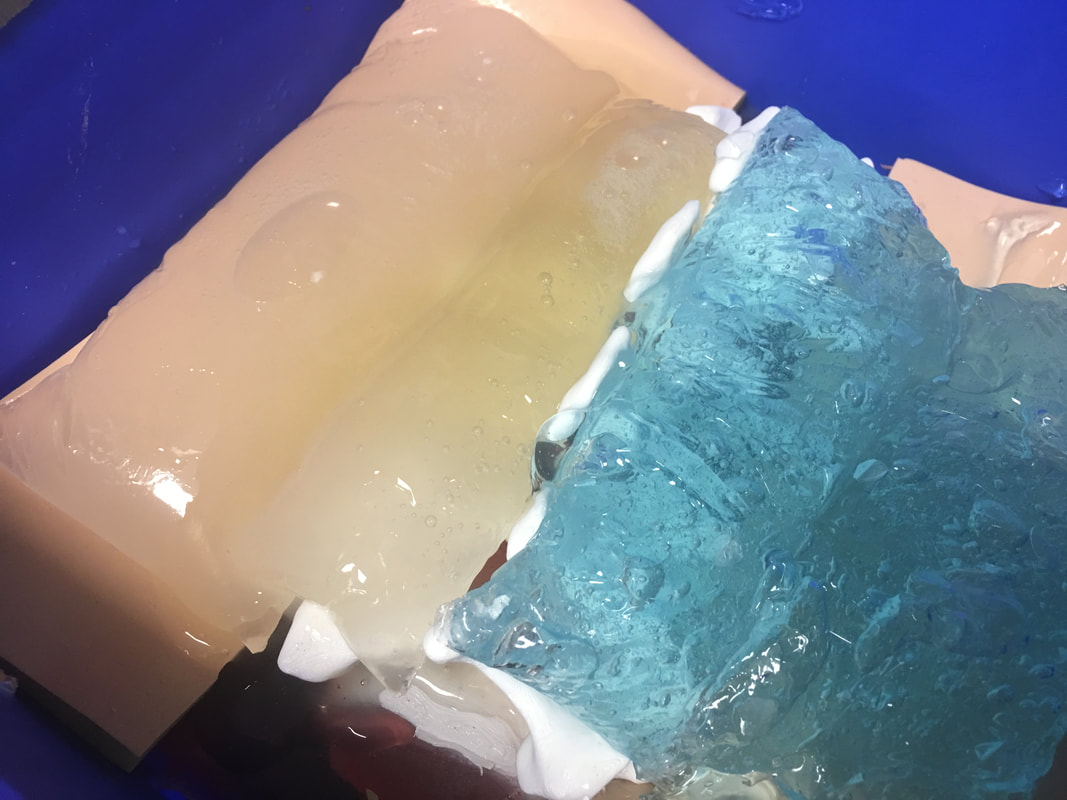 I tested the ultrasound visibility at this point, and I got interesting results. Just as a reminder, here's the view from an actual cadaver that I'm trying to replicate: 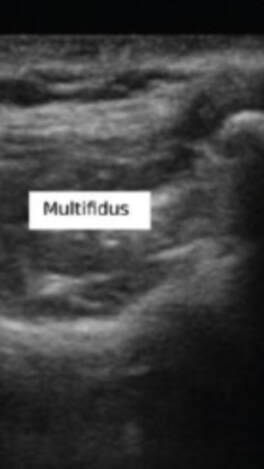 Cadaver photo Directly below is the view from the guar gum gel side, and further below is the view from the ultrasound gel side:
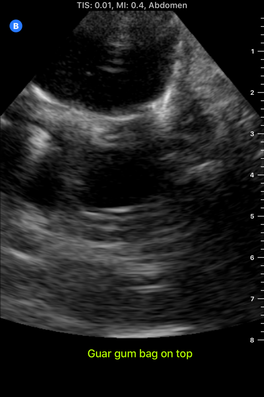
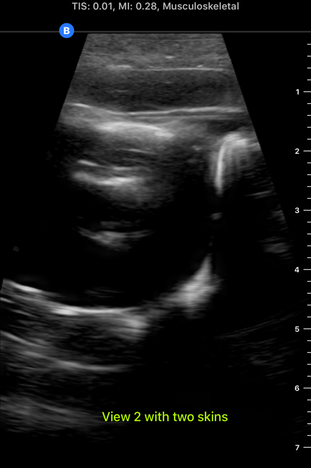
However, there are still some layers of fat and muscle above the spine that my model didn't yet show. I started by making a thin, square shaped bag that resembles a surface muscle and placing it on top of everything, as shown in the picture below:  The ultrasound view is slightly more similar to the real cadaver view with the bag on top, because a thin surface (represented by white in the image) is visible at the top.
However, the actual cadaver has multiple layers of tissue above the spine, as can be seen in the cadaver photo far above. Above the outer muscle layer that I just made, there is also a thin fat layer that ultrasound waves easily penetrate, and a layer of skin. I made the fat layer by making a glycerin/water emulsion, because KY jelly (which is mainly water and glycerin) was very low-resistance in yesterday's trials. I used a vacuum to remove the air bubbles from this bag, and I placed it on top of the guar gum gel bag. On top of everything I placed a slab of polyurethane rubber, which has acoustical properties relatively similar to those of human skin. Here is the result from the outside: 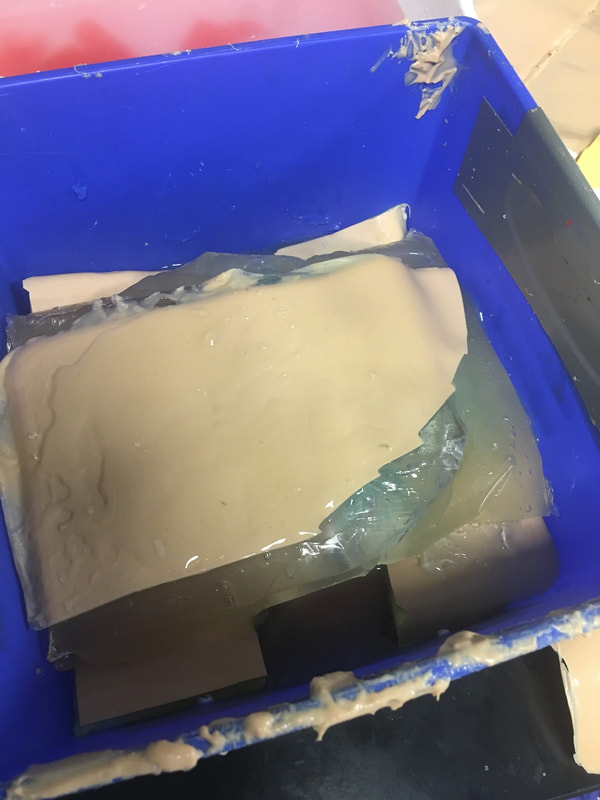 Testing this with the ultrasound showed that this looks reasonably similar to the cadaver when viewed with the ultrasound. Here is a comparison:
This model looks considerably better than it did when it started! However, Dr. Bohl still had plenty of suggestions for improving it. There is a big shadow under the longissimus, which suggests that the ultrasound waves have a hard time penetrating a bag of guar gum gel that is as thick as the one used here. There is also a more significant issue at present: the texture of this model is much more watery than the texture of human tissue. In fact, if I poke the skin, I can see the watery bags underneath rippling. This wouldn't provide a kinesthetically realistic experience, so we'll keep searching for ways to make the texture more realistic. Dr. Bohl suggested that we try gelatin, so we stopped at the store on the way home and picked some up. I'll definitely investigate using gelatin in the models during my research tomorrow.
My independent study was off to an early start today! Dr. Bohl's workday starts at 6 AM, so we left his house at 5:30. As we drove to the hospital, Dr. Bohl explained the residency system to me. After graduating from 4 years of medical school (after 4 years of college), all medical students who want to become doctors must complete a residency, which is like an apprenticeship at a hospital. The length of a residency depends on the specialty that the student focuses on. Some residencies, like the general surgery residency, usually last 5 years, while others, such as the neurosurgery residency, last 7 years. Residents acquire more experience each year, and by the end of their residency, they are the primary leaders of the residency program. The demands on neurosurgery residents are certainly challenging! He explained that second year is widely considered the hardest year of residency, because second year residents must arrive at the hospital at about 4 AM to do rounds, and they don't leave until everyone is taken care of, which means that they often stay at the hospital until past 9 or 10. The schedule becomes slightly more forgiving after the second year, but residency is still highly demanding. Dr. Bohl is a 7th year resident, so he begins each day by meeting with the younger residents and giving them advice on analyzing scans.
I accompanied him to this meeting this morning. It was interesting to hear Dr. Bohl use neurosurgery-specific technical language when talking to the residents about their scans. In fact, listening to them converse reminded me of listening to people speak in other languages that I'm learning, especially Chinese. I could pick up some words, and the images helped contextualize things a bit, but there was still (of course) plenty that I didn't understand with my current level of knowledge. Still, I enjoyed picking up what I could from their discussions. After the meeting, Dr. Bohl showed me downstairs to the Barrow Neurosurgery Innovation Center, which is the lab where Spine STUD models were developed and are still made. There, he introduced me to senior lab engineer Sarah McBryan. After giving me the standard safety talk, Sarah gave me a document that outlined the first project that I would be working on. Currently, the Spine STUD models mimic the bone structure of a person relatively well, but they're made of 3D printed plastic and various dry polymers, so they don't respond well to ultrasound. My project involves finding a combination of materials that allow ultrasound to pass through them. These materials could be used in the models to represent muscle, which would allow the 3D printed plastic bone to be visible beneath, just like bone in a real person. After a brief introduction, Sarah gave me some supplies to begin experimenting. I didn't know much about ultrasounds, so I began by doing a bit of research on how they work. Ultrasounds work by sending sound waves into a target and detecting the sound waves that return, then analyzing these sound waves and making them into an image. Thus, to get an image, it's necessary to send the sound waves through a material that is dense enough to carry them, but not so dense that the material absorbs all the sound waves and doesn't reflect them. I started by trying the ultrasound on my own arm, and though I wasn't exactly sure what I was looking at, I did see some imagery. After I had a very basic idea of how to use the ultrasound, I prepared to do the experiment. First, I used the impulse sealer to make bags out of heat shrink plastic. Then, I filled these bags with water and a super absorbent polymer (SAP) to make a gel-like substance and put a 3D printed vertebra replica inside this mixture. This gel-filled bag distantly resembles a human body, and it also roughly resembles the Spine STUD models that I'm working to improve. Finally, I put a thin layer of gel on the surface of the bag to ensure that tiny air bubbles don't block contact between the probe and the surface. I spent several hours trying various combination of materials for the bag skin, filling, and gel, including heat shrink plastic, PVC, and synthetic collagen for the bag, and SAP, baby oil, shaving cream, gelatin, glycerin, ultrasound gel, and saline water for the filling and gel. For several hours, I wasn't getting any readable images, and it was difficult to tell if I was making any progress. However, such failure is an essential part of science, and I did develop an improved understanding of the ultrasound from those hours of experimentation, even it I wasn't getting any usable images. After lunch, I kept experimenting, and I discovered that glycerin works quite well as an exterior gel if ultrasonic gel is running low. I also started getting better test images when I just submerged the bones in water, so I used bones submerged in water, glycerin, and various other materials to simultaneously practice using the ultrasound and test the acoustic properties of these materials without the bag. Just as I was beginning to understand the ultrasound, Dr. Bohl came down to the lab because he had finished his operations for the day. We discussed the progress I had made, and he suggested filling some long, thin bags with water to simulate spinal muscles. We tried scanning 3D printed bone through these bags, and we discovered that it was actually easier to see through this "muscle" to the bone than it was to see the bone inside the bags that I was experimenting with earlier. One possible explanation for this is that there may have been some air bubbles between the skin of the bag and the bone in the bags I was experimenting with, which would have made it harder to get a high-quality image. I'll definitely investigate this more tomorrow. We left at about 8, and Dr. Bohl explained that it's quite common for residents to work 12-14 hour days. In fact, it's not unheard of for residents, especially second year residents, to work 20 hour days. However, once surgeons complete their residency and reach attending status, they have considerably more scheduling flexibility. After morning rounds today, I went straight back to the lab to continue working on finding a material that works well with the ultrasound. Trying the ultrasound again, I realized that I now found it much easier to identify an image. Using the ultrasound effectively requires constant adjustment of angles, and it takes practice to identify the correct angles to hold the probe at to get an image. In addition, it's also necessary to adjust the zoom, gain, frequency, and field of view to get a good image. I didn't quite understand how all these factors fit together when I first started using the ultrasound, so it's no wonder I didn't see much. I remade a bag that I tested yesterday, and I discovered that using glycerin as gel-as I was doing yesterday-was actually quite effective. This suggests that yesterday's lack of image quality was largely due to my inexperience with the ultrasound, not necessarily ineffective materials. Now that I have a better understanding of the ultrasound, I rested the ultrasound visibility of a 3D printed vertebra submerged in super absorbent polymer (SAP). The variable I changed in each trial was the material of the bag, and the goal of the experiment was to find the lowest-resistance bag material. Eventually, I'm trying to replicate the view that a surgeon would get when using an ultrasound on someone's spine when they are laying face down. Below are some images that I got from the ultrasound today. For reference, above is an image from an actual cadaver of the entire view I'm trying to replicate, and below is the same image cropped to show the lab's ultrasound's field of view: 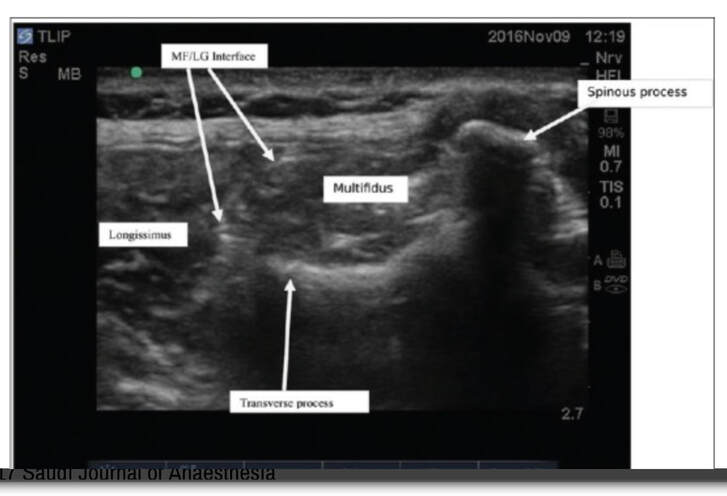  Below are images from various trials that I did. The goal is to get them to look as similar as possible to the picture just above.
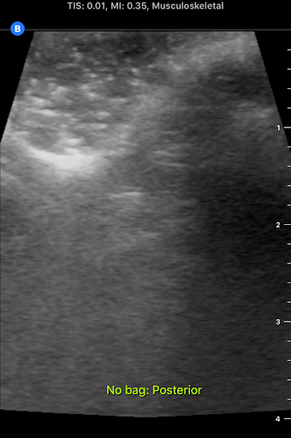
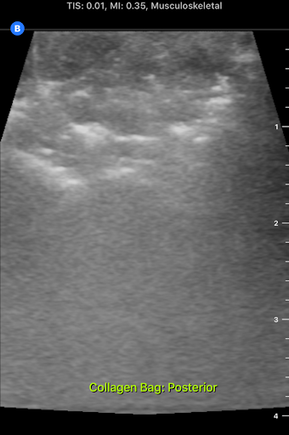
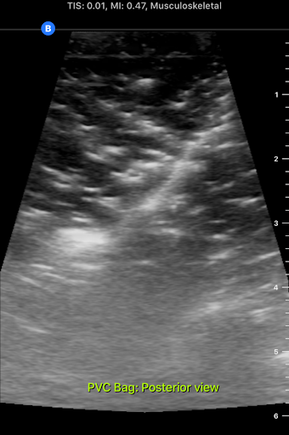
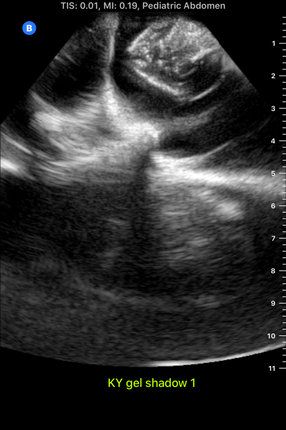
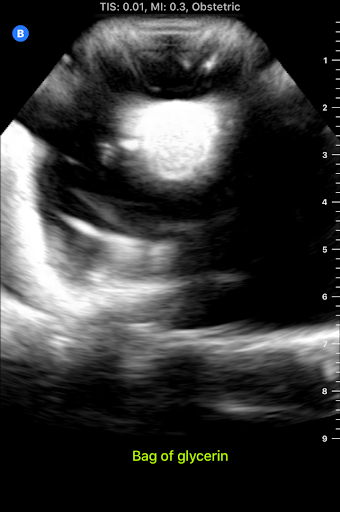
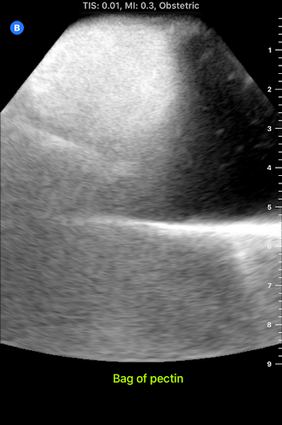
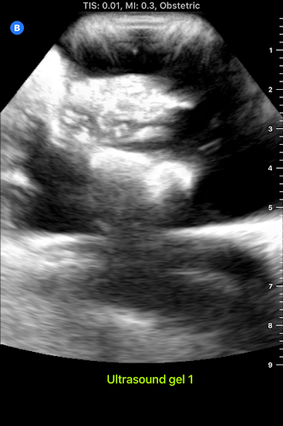
The plastic casing image, which was actually polyurethane (heat shrink plastic) gave the best quality image, so I used that for all future trials. After this test, I started making "muscle" by filling polyurethane bags with various aqueous materials and testing the size of the auditory "shadow" they cast. These shadows occur because all materials absorb sound waves, so the "muscle" makes all objects below it harder to see. Below are images of tests with various muscle fillings:
The bag of pectin cast an enormous shadow, while the KY gel cast a very small shadow. Ultimately, the best material ended up being a mixture of guar gum and water, so we used that to make most of the muscles. Tomorrow, I'm planning on making a full prototype with a 3D printed spine and many layers of muscle and fat using what I've learned today about the utility of various materials.
During lunch, I got the opportunity to go to an interesting seminar about the neuroscience of addiction. The most important message of the seminar is that studies have shown that menthol and nicotine combined are significantly more addictive than nicotine alone in mice, even though menthol has no addictive properties alone. This finding can be applied to both smoking and vaping, since menthol is a popular flavor among users of both nicotine delivery mechanisms. In fact, menthol is the only legal flavor of cigarettes in the US, the goal of which is to reduce the attractiveness of cigarettes to minors. However, there are no such regulations on vape flavors, and candy-like flavors from popcorn to cherry are popular among those who vape. The presenter said that the chemical composition of each vape flavor is distinct, and many vape flavors, such as green apple, have addictive properties or health risks on their own. Much research still needs to be done on the way in which the chemicals in vape flavors affect the brains of their users. Today I arrived in Phoenix, Arizona to begin my neurosurgery independent study with Dr. Michael Bohl, a Maumee Valley alum and chief neurosurgery resident who has graciously agreed to host me for two weeks. After he picked me up from the airport, we drove to the Barrow Neurological Institute at St. Joseph's Medical Center in Phoenix to pick up scrubs for me and tour the hospital. After we picked up my scrubs, he showed me downstairs to the lab that I'll be working in. Michael founded a company called Spine STUD that uses 3D printing technology to make realistic models of the human spine and surrounding bone structures on which surgeons can practice techniques, and this lab is where these models are made. Part of my independent study will involve working with engineer Sarah McBryan to improve the models in various ways.
One project I might work on involves modifying the models so that it becomes possible to use an ultrasound to observe the 3D printed "bone" structure inside without making any incisions. This would closely replicate a surgeon's experience with an actual patient. Currently, the models don't allow for this, since their interior is mostly filled with dense foam. Ultrasounds work by sending sound waves toward an object and analyzing the sound waves that bounce back, so they don't work on materials like foam that don't respond strongly to vibrations. Water, however, works extremely well with ultrasound, which is why ultrasound works well on human bodies. In the lab, I could explore other materials that could be used instead of foam in the models, especially water-based materials. One material that Michael suggested and has had success with in brief tests is sodium polyacrylate, a material that expands to over 10 times its dry volume when water is added. (It's also commonly used in diapers!) Given this material's capability to hold water, it also responds well to ultrasound, so it would be a relatively realistic thing to fill models with. I'll explore other materials as well to find out what works best! |
Jeremy MahoneyI'm a high school student at Maumee Valley Country Day School, and I'm currently doing a neurosurgery-focused independent study at Barrow with Dr. Michael Bohl. ArchivesCategories |


 RSS Feed
